
Table of content
How to Use Quick Print
Quick Print makes simple, ready-to-print activity calendars and menus in about a minute. Pick your style once, choose what you want on the page, then preview and download.
Quick prints are intentionally simple. If you need heavier customization - custom layouts, images, multi-page designs - use Documents, Calendar, or Slides instead.
Before you start
Sign in to Prntyr and click Quick Print in the top menu bar. The page has two halves: your style on the left, and your printout content on the right.
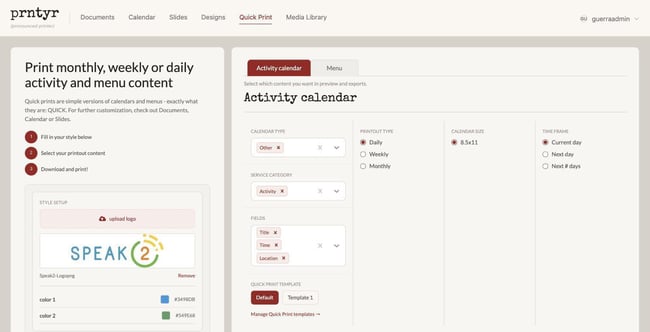
Step 1 - Set up your style
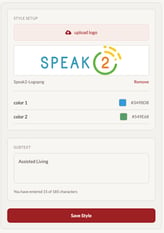 This is the branding that appears at the top of every printout. You only need to do this once; it stays saved for next time.
Add your Logo, Border Color, Subtext and Save your Style.
- Upload logo - click the upload box and choose your community's logo file. Once uploaded, it appears in the preview box below, with a Remove link if you need to swap it.
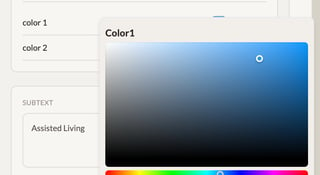
- color 1 / color 2 - click a color swatch to open the color picker and choose your border colors. The hex code next to each swatch shows the current color.
- Subtext - type the line that prints beside your logo, for example, your community name or level of care ("Assisted Living"). You have up to 185 characters, and the counter below the box tells you how many you've used.
- Click Save Style.
Save your style before you generate a printout, otherwise your changes won't be included.
Step 2 - Choose what to print
At the top of the right-hand panel, pick the tab for what you're printing: Activity calendar or Menu.
Option A: Activity calendar
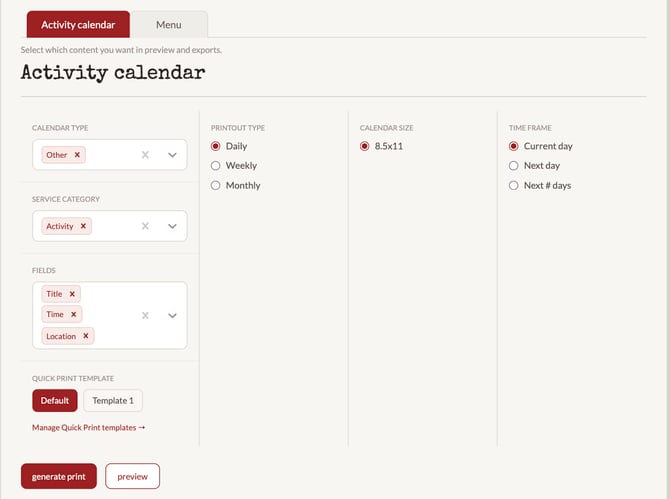
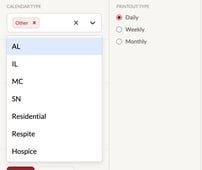
Calendar type - which calendar the activities come from (AL, IL, MC, SN, Residential, Respite, Hospice, Other). Click the dropdown arrow to see the list. Click an option to add it; click the small × on a tag to remove it.
Service category - which kinds of events to include: Activity, Concierge, Maintenance, Transport, Care, Valet, Wellness, Housekeeping, and more. You can select more than one.
Fields - what shows for each event on the page: Title, Time, Location, Short description, Long description. Keep this short for daily and weekly prints; long descriptions take up a lot of room.
Quick Print template - choose Default or Template 1 for the page layout. (Manage Quick Print templates → is where templates are set up, usually by an administrator.)
Then set the three columns on the right:
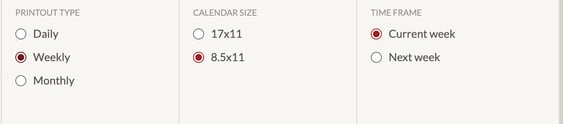
Printout type - Daily, Weekly, or Monthly.
Calendar size - 8.5x11 (standard letter) for daily prints. Weekly and monthly prints also offer 17x11, the larger poster size for hallway and lobby boards.
Time frame - the options change with the printout type:
| Printout type | Calendar size | Time frame |
|---|---|---|
| Daily | 8.5x11 | Current day, Next day, Next # days |
| Weekly | 17x11 or 8.5x11 | Current week, Next week |
| Monthly | 17x11 or 8.5x11 | Current month, Next month |
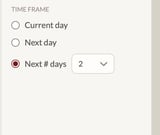
Choosing Next # days adds a small dropdown where you pick how many days ahead to include.
Option B: Menu
Click the Menu tab.
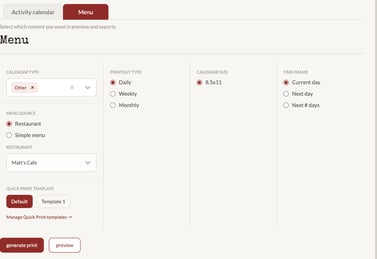
Calendar type - same as above: which community or level of care this menu belongs to.
Menu source - choose one:
- Restaurant - pulls the menu from one of your dining venues. A Restaurant dropdown appears below so you can pick the venue.
- Simple menu - uses your simple menu content instead; no venue to choose.
Quick Print template, Printout type, Calendar size, and Time frame work exactly the same way as on the Activity calendar tab.
Step 3 - Preview and download
You have two buttons at the bottom of the panel.
Preview first (recommended)
Click preview. It takes a few seconds to build - you'll see "Preparing preview" while it works. Your printout then opens full-screen, exactly as it will print.
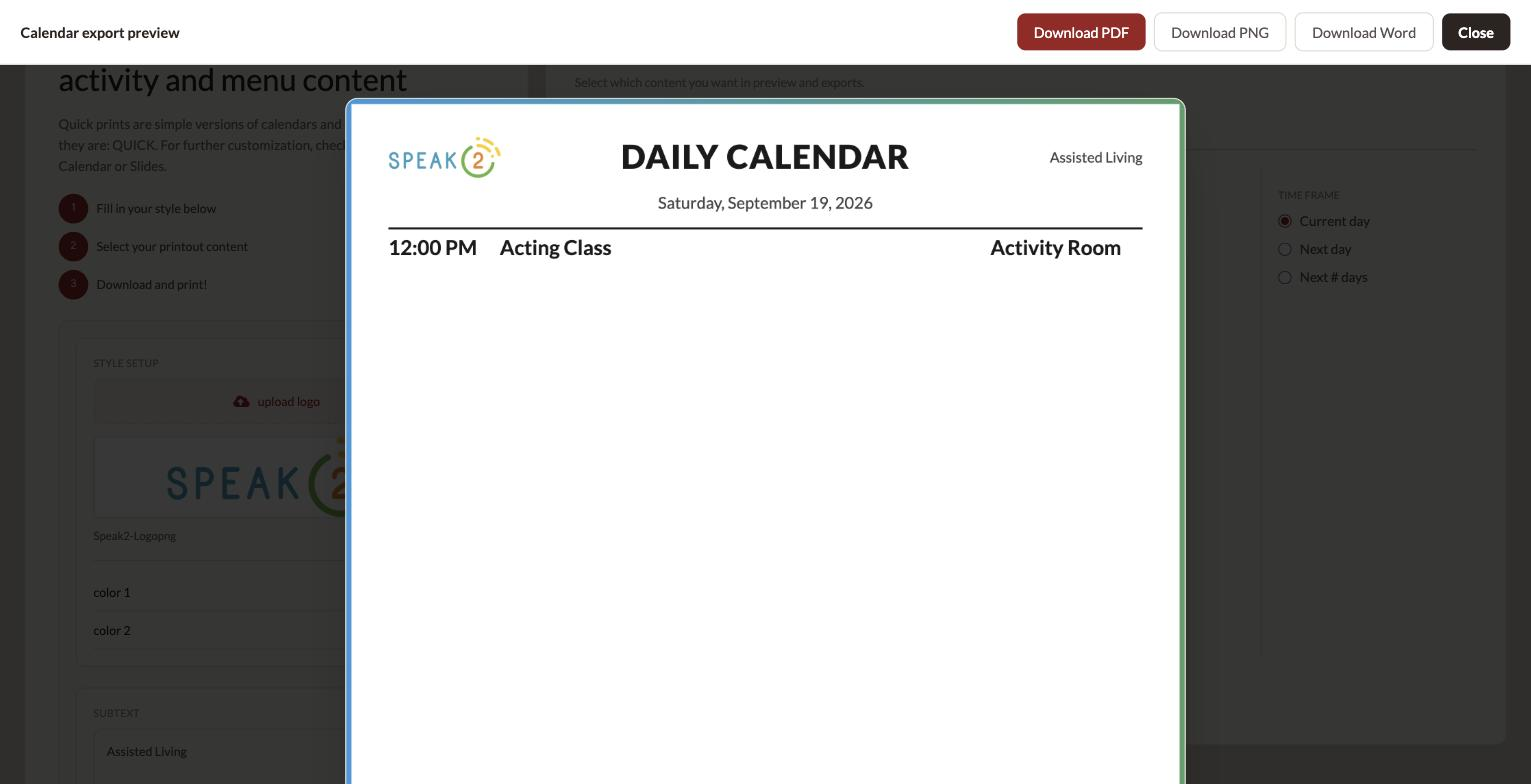
From the bar at the top of the preview you can download it in three formats, or click Close to go back and adjust your settings.
- Download PDF - best for printing.
- Download PNG - an image, for posting to a screen, slide, or newsletter.
- Download Word - an editable document if you need to tweak the wording before printing.
Or generate the print directly
Click generate print to skip the preview and download straight away. You'll be asked to choose an export quality first:
- Standard - smaller file size, current quality. Fine for quick reference copies.
- Print High - better sharpness (~300 DPI). The usual choice for anything posted or handed out.
- Print Ultra - maximum sharpness (~500 DPI), larger file. Best for the large 17x11 posters.
Click generate print in that window to confirm. "Preparing download" appears while the file builds - higher quality takes longer, up to around a minute - then the file lands in your Downloads folder. Open it and print.
Quick troubleshooting
The printout is blank or missing events. Check your Service category and Time frame. If you've only selected "Activity" and there are no activities scheduled for that day, the page will come out empty. Also confirm the Calendar type matches the calendar the events live on.
The page looks crowded. Remove a field - Long description especially - or switch from 8.5x11 to 17x11 on a weekly or monthly print.
My logo or community name isn't showing. Go back to the style panel and click Save Style, then preview again.
Preview is taking a while. That's normal, especially for monthly calendars and higher export qualities. Let it finish rather than clicking again.
I need something Quick Print can't do. Quick prints are deliberately simple. For custom layouts, photos, or multi-page pieces, use Documents, Calendar, or Slides.