
Table of content
Print Meals on One or More Tickets
Printable instructions here: Dining App Overview
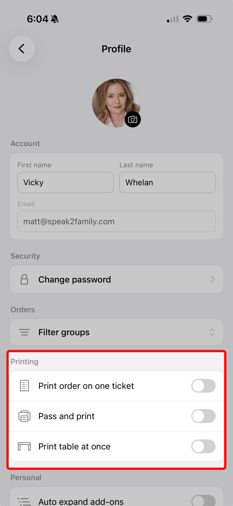 Check out Printing settings. By default, orders are printed on separate tickets, but you can choose to print the entire order on one ticket.
Print order on one ticket
Turn this on so the entire order prints on one ticket. If not, each item you add will print presented to print individually.
Pass and print
Turn on this so you can pass menu items you add to stations. For example, send soup to the Soup station or entrees to the Chef station.
Print table at once
Turn this on if you'd like an entire tables order to print at once.
The Printer and iPhone or iPad must be on the same network. Otherwise, they will not connect.
Connect a Printer
Connect to any AirPrinter or Star Printer. Check out compatible printers here: https://support.apple.com/en-us/HT201311
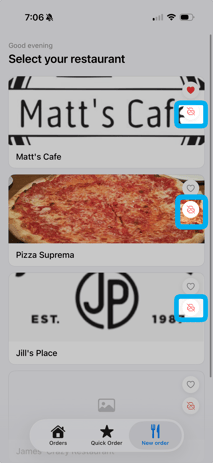
- Click "Place Order"
- Select the Printer icon next to the Restaurant
- Click "Add Printer"
- Select AirPrint or Star Printer
- Follow the steps to connect the printer
Speak2 recommended printer: We use this for our demonstrations. It's easy to set up and prints 4x6 meal cards.
Troubleshooting Printer Settings
- Printer and iPhone/iPad must be on the same WiFi network.
- If printing is taking a long time, it is likely due to a slow network.
- We recommend to label the printer with the WiFi and Password that it is connected to. All Dining devices will need to connect to the same WiFi.
- Confirm the printer is on and connected to the right network (yes we are asking again :))
Connect your tablets and phone to the same WiFi network as the printer. Write down the network name and password during printer setup.