Table of content
Dining Management Overview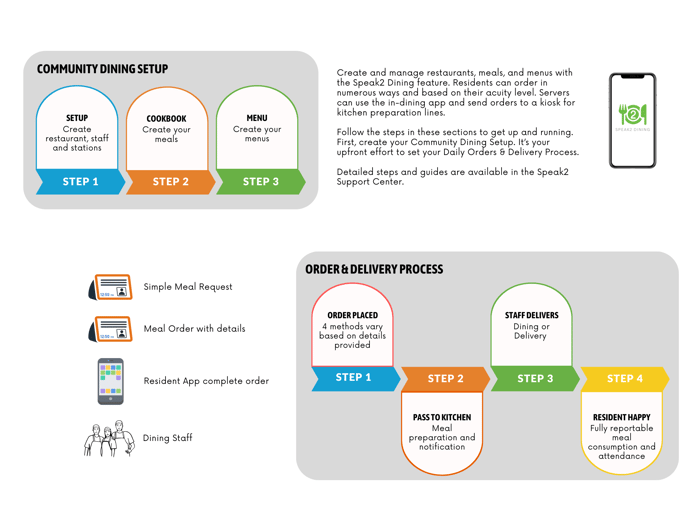
Dining management video tutorial
Set up your Community
Set up your restaurants, staff and stations.
- Go to Settings in the top right navigation and select the Dining option.

- Here is a sample of a restaurant setup to be used as a reference.

Create and Manage Restaurants
Add as many restaurants as needed.
Some communities create "All Day Menu" and "Specials" as separate restaurants to help the order process.
- Click the "+" button in the top right.

- Fill in all of the details. Note that only Name, Description and Max Capacity are required. We do recommend adding an image as it will be displayed on Alexa and the various apps.

- Once entered, you can always edit any details later by clicking the underlined name in the restaurant list.

- Next, add tables and seats. You do NOT need to add tables or seats. If your community takes orders by resident name, this step is unnecessary. To do this, click the "0" in the Tables column. NOTE: these are entered as a single entry. So, if you are taking orders by seat, you must enter the table/seat for each seat. E.g., table 1/seat 1, table 1/seat 2.

- Then click the plus button to enter a table/seat.

- Enter the Table/Seat details.

We have a description and photo of the tables/seats. Residents like to see where the table is located or the view from that location.
This completes setting up your restaurant. You can edit any of these items anytime, and they will immediately reflect across the whole system.
Create and Manage Staff or Station
Staff and Stations are created in the same way.
We consider station areas for specific meal prep. E.g., Drink station, Hotline, etc. These are important for the live dining experience as we assume orders will be sent to stations.
- Click the plus button above the staff section.

- Fill in the details and click Submit.

- The staff member will receive an email with their information and can log in to the Dining app. They will be prompted to change their password.
- To edit a staff member, click their name. To delete a staff member, hover over their name and click the garbage can/delete button.
UID and Email MUST BE UNIQUE. You cannot use the same email or user ID for multiple people.
Next is setting up your Cookbook and Menus. Click here to go to that article.